
Lets Begin - Proxmox VM Set up
Lets Begin - Proxmox VM Set up
Feb. 3, 2024, 10:57 p.m.
Server, Blog,
0 Comments
Creating a virtual machine (VM) within the Proxmox environment involves several steps, each of which I'll guide you through meticulously. Proxmox is a robust virtualization platform harnessing the capabilities of KVM (Kernel-based Virtual Machine) and LXC (Linux Containers) technologies. Below, you'll find comprehensive instructions on VM creation in Proxmox:
Prerequisites: Before you begin, ensure the following prerequisites are met:
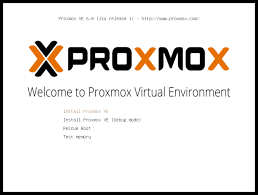
- Proxmox VE should be installed and operational on your server.
- Have an ISO image or template ready for your VM's operating system installation.
Step 1: Access the Proxmox Web Interface
- Open your web browser and input your Proxmox server's IP address or hostname into the address bar.
- Log in using your credentials.
Step 2: Initialize VM Creation
- Within the Proxmox web interface, navigate to your desired storage location, usually labeled as "local" or "local-lvm," located in the left sidebar under "Datacenter."
- Locate and click on the "Create VM" button.
Step 3: VM Creation Wizard Configuration
The VM creation wizard will guide you through a series of configuration steps:
General:
- Node: Choose the Proxmox node where you intend to create the VM.
- ID: Assign a unique numerical ID for the VM.
- Name: Give your VM a descriptive name.Template: Depending on your needs, select "ISO image" for installing from an ISO or "QEMU/KVM Template" for using a pre-configured template.
- OS: Pick the appropriate operating system (e.g., Linux, Windows).
Options:
- Depending on your chosen OS, you might encounter additional settings such as CD/DVD, EFI BIOS, etc. Configure them according to your requirements.
Hard Disk:
- Define the virtual hard disk's size for your VM. You can opt for default settings or customize them based on your specifications.
CPU:
- Determine the number of CPU cores and sockets to allocate to the VM. You can also specify the CPU type.
Memory:
- Allocate the desired amount of RAM to your VM. You can either adjust the slider or enter the amount in megabytes (MB).
Network:
- Select a network model, usually "virtio," and choose a bridge, typically labeled as "vmbr0."
Confirm and Finish:
- Review your configured settings and confirm by clicking the "Finish" button.
Step 4: Mount ISO or Utilize Template
- If you've selected an ISO image in the "General" section, you'll be prompted to pick the ISO image to use for VM installation. You can either upload the ISO or select one from your storage.
Step 5: Initiate VM Installation
- After configuring all settings and selecting your ISO/template, click "Finish" once more. This action will create the VM and trigger the installation process if you opted for an ISO.
Step 6: Conclude the OS Installation
- Follow the on-screen instructions to complete the installation of your chosen operating system within the VM.
Step 7: Post-Installation Configuration
- Once the OS installation concludes, you may need to configure additional settings within the VM itself. These settings might encompass networking, software installations, and security configurations.
That's it! Congratulations, you've successfully created a virtual machine within the Proxmox environment. From this point forward, you can manage, start, and stop your VM as needed via the Proxmox web interface.
0 Comments
No Comments Yet!
© TopITSolutions. All Rights Reserved.